For all of those who regularly work on applications like word press, errors like white screen of death and errors related to database are very common and occur regularly. But another kind of errors which users can come across due to internet connection or Domain Name System are also very common.
One such error is google page showing a message ‘this site can’t be reached’ or Ip address is unable to be found with a code message DNS_PROBE_FINISHED_NXDOMAIN. This occurs whenever you try to access a web page.
This becomes very frustrating for users as they cant access that particular website which they are trying on hence, obstructing the flow of their work.
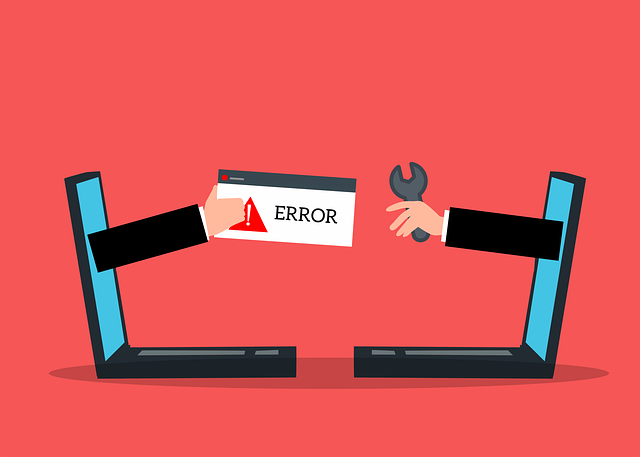
This error not only occur on chrome but also on firefox, Edge and other browsers too. If you are also encountering such errors while trying to open wordpress site, you need not to worry. Here, in this article I will be providing you with some easy and effective solutions which might work for you.
Read Also:
Contents
- 1 What Is DNS_PROBE_FINISHED_NXDOMAIN
- 2 How To Fix DNS_PROBE_FINISHED_NXDOMAIN
- 2.1 Solution 1: Release And Renew the IP Address
- 2.2 Solution 2: Restart DNS Client Service
- 2.3 Solution 3: Change DNS Servers
- 2.4 Solution 4: Reset Chrome Flags
- 2.5 Solution 5: Check Your Local Hosts File
- 2.6 Solution 6: Disable VPN and Antivirus Temporarily
- 2.7 Solution 7: Check DNS Of Your Domain
- 2.8 Solution 8: Restart Your Computer
- 3 Conclusion
What Is DNS_PROBE_FINISHED_NXDOMAIN
You must have heard about DNS. DNS stands for domain name system which is responsible for collecting the domain names to webservers. It can be said as a mediator between human request and computer server.
When we enter the name of a site or of a domain, it translates it into an IP address which is a numerical address. So, you encounter the error when there is a problem with DNS or if it is unable to configure properly.
When DNS is performing a task of DNS name resolution which is the process of resolving name of an URL a person enters to the IP address of web servers. But sometimes, when DNS is going through various IP address to find out the actual IP address, it may fail to get it or resolve it.
This failure results in DNS_PROBE_FINISHED_CONFIGURE error in which NXDOMAIN stand for non existent domain. The error could vary according to the browser you are running.
Google Chrome
In google chrome, you will encounter a page popping up the message This site can’t be reached. And server IP address could not be found followed by the error name DNS_PROBE_FINISHED_NXDOMAIN . It will also give you an option to reload the page.
Mozilla Firefox
In mozilla firefox, the page will not show the name of an error or something like that. It will just say Hmm. we are having trouble finding that site. It will also show you some solutions which you could try like trying again or checking network connection.
Microsoft Edge
In Microsoft too it will show Hmm…can’t reach this page. It will also advise you to make sure that you have got the right web address. Also, it will give you an option of another website name which you can try and will ask you to refresh the page.
Safari
In safari browser, it will show Safari can’t find the server in bold followed by safari can’t open the page**name of domain** because safari can’t find the server **domain name**
How To Fix DNS_PROBE_FINISHED_NXDOMAIN
In following sections of this article you will find some of the easy and effective solutions which you can try to solve the error DNS_PROBE_FINSIHED_NXDOMAIN. You need not to try each and every one of these solutions or start by first one only.
You can look for the solution which according to you is most suitable and then if that one not work, you can look for others too. Please read all the steps carefully and then follow. Let’s get started.
Solution 1: Release And Renew the IP Address
Because the issue if from client side which means by your side, the very first thing which you should try is to release and renew your IP address. This process will also consists of various other things like Flushing DNS cache. . you can do so in windows by:
Windows
Step 1: Open the command prompt in windows. To do this you need to press two keys-Windows logo key and R key.
Step 2: Run command will now be opened and you will get a bar where you need to type command- ipconfig/release.
Step 3: Once you type this command, hit the enter button. The command when executed will release your IP address which you are currently using.
Step 4: Next, type ipconfig/flushdns command and hit the enter button. This command will flush or say erase your local DNS cache.
Step 5: If the command is properly executed, you will get a message “successfully flushed the DNS resolver cache”.
Step 6: Once done, type ipconfig/renew command and again hit the enter button. This command when executed, will renew your IP address.
This was the one way but you could also try doing it by resetting your IP address settings. Another way is to reset winsock catalog. To do this type the following command
Netsh int ip set dns.
Netsh winsock reset
If you are not comfortable trying these two methods, another way is to disable your network adapter once and then re-enable that.
Mac
To renew your IP address in MAC, follow the steps mentioned below.
Step 1: Open system preferences.
Step 2: There will be a network icon, click on it and after that on the right side Click on the advanced button.
Step 3: A screen will open showing different headings, click on TCP/IP heading.
Step 4: Next, click on renew DHCP.
Mac users can also clear the local DNS cache just like we did above for windows. The process in mac is little bit different
Step 1: go to utilities. Next, click on terminal.
Step 2: You need to type command dscacheutil-flushcache
This command will flush the local DNS cache from the mac but you will not get a success message saying that the cache is cleared.
Solution 2: Restart DNS Client Service
In windows, one can try shutting and then restarting DNS client services. These service caches and resolves the domain name of DNS.
To do this
Step 1: Get your hands on keyboard and press windows logo key+R. This shortcut will open up command prompt.
Step 2: Next, type the command services. msc and then hit the enter button to execute it.
Step 3: Look for the DNS client and then select restart option by clicking right on it.
Step 4: If the restart option turns grey in colour and is not responding, don’t worry, we have another possible way for it.
Step 5: Afterwards, open the command prompt again and then type cmd.
Step 6: After you hit the enter button, type
Net stop dnscache
Net start dnscache
And press enter key. If the DNS client service gets started, then it’s good to go but if it is still showing an error, then you should try another alternatives given below.
Solution 3: Change DNS Servers
Next thing you can try to change the DNS servers. Although, DNS servers are automatically assigned to you by internet service provider you can temporarily change these to other servers like Google or Cloudflare.
This is the very effective method. You can change to either of these softwares but i will be showing you how to do it in cloudflare. If you want to use Google’s public Domain name system or DNS then you simply need to replace the code with (8. 8. 8. 8 AND 8. 8. 4.
4)People prefer to use this system because it is more reliable and trustworthy DNS. At the same time, cloudflare’s DNS is also blazing fast free and is just launched.
One tip for you all i would like to mention here is that if someone is already using free DNS servers, changing them to ISP’s servers will also help a lot because google and cloudflare servers are not 100 percent good and hence, switching from them to ISP’s servers have resulted in resolving the pertaining issues and fixing the things.
Windows
Step 1: If you are a window user, open command prompt by pressing windows logo key and R . Then in a typing box, type control panel and hit the enter button.
Step 2: Next, click on Network and internet option. Afterwards, navigate towards Network and sharing centre and then finally select Change adapter settings.
Step 3: Select the type of connection you are using, either wireless network connection or local area connection and then select properties option from drop down menu.
Step 4: Next, there will be an option Internet protocol version 4(TCP/Ipv4), click on it.
Step 5: In the protocol version, click on Use the following DNS server addresses and then replace the existing DNS server addresses with the following:
IPv4: 1. 1. 1. 1 and 1. 0. 0. 1
IPv6: 2606: 4700: 4700: : 1111 and 2606: 4700: 4700: : 1001
After typing these addresses, click the OK button and afterwards, close. After you do as mentioned, Restart the computer or browser.
Mac
Step 1: On mac, open system preferences and then CLick on the network icon.
Step 2: Next, click on the advanced option and then open the DNS tab.
Step 3: Further, type addresses as mentioned above.
Solution 4: Reset Chrome Flags
Sometimes chrome’s settings or certain features automatically get changed or even users can accidentally do that. So, another solution could be to reset these settings.
For this, you need to enter chrome: //flags in the chrome of any other browser you are using and afterwards, click on Reset all to default option present in the upper side of screen. Once you do it, restart the computer or a browser and then visit the website again.
Solution 5: Check Your Local Hosts File
These files will be found in every computer. The local hosts file are a type of files that contains all the DNS entries records with the IP address that are mapped towards. This file can only be changed or edited when you want to preview your DNS .
But there are many other ways through which you can do it. So, another alternative is to open this file and see that website you are trying to access is not present there, and if it removing it because that’s what causing the error.
Windows
These hosts files require special kind of access so first what you need to do it to get your text editor as an administrator. to do this:
Step 1: Go to the windows icon or start menu of your computer and then type in the search bar for the text editor.
Step 2: Next, right click on it and then change the settings to run as an administrator. The text editor could be anything like atom, notepad, etc.
Step 3: In text editor, open file and then click on open and browse to the location:
C: /Windows/System32/Drivers/etc/
Step 4: Look for the hosts file and then open it.
Step 5: Check properly and if needed, two times to see that the website you are trying to access is not there and if you found it there, remove it.
Mac
For doing this process on mac, it is recommended to download the free application gas mask. This can be used as hosts file manager, or hosts file editor. It actually makes the things easy but if you are not comfortable with that, follow these steps to do all of it manually:
Step 1: First, go to utilities. Next, click on terminal and then you are required to type certain commands sudo nano/private/etc/hosts and hit the enter button.
Step 2: In mac too, check if the file is there. If you found it, edit and remove it.
Solution 6: Disable VPN and Antivirus Temporarily
VPN or antivirus softwares can block certain files if suspicious of malware and virus. These features can conflict with network settings like of DNS servers too. Best thing to do in this case is to disable them for some time and then check if file is now accessible.
Solution 7: Check DNS Of Your Domain
If you are still encountering the error then you need to pay attention to your DNS domain. if the error is occurring on a single domain then you can check the DNS settings. And if you recently shifted to new DNS service provider, the DNS could also catch incorrect information in the system. To solve that Solution 2 will surely help.
Solution 8: Restart Your Computer
If you have reached here without getting your problem solved, then the last option is to just restart your computer and even the router because these things temporarily catch the cache and then create issues.
This is the most common problem for tabs or applications or some website not opening and hence the most effective one so just restart your computer and router once.
Also Read:
- Nvlddmkm.Sys
- Download Twitch VOD
- Err_Proxy_Connection_Failed
- Video Scheduler Internal Error
- How To Screenshot on Mac
Conclusion
So, i hope in between resetting chrome flags, changing DNS servers and renewing IP address the error in your computer must have been solved. If not, the it’s always better to contact operator or professional of tech fields to provide necessary assistance. Thank You TV and have a good day!


