As we are turning into a modern world where technology has become an essential part of our life. Video games have also become an integral part of it. In recent times, there has been a massive increase in number of gamers. The gaming industry have grown immensely especially among teenagers.
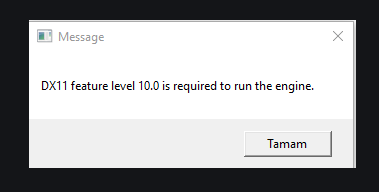
Nowadays, most of the teenagers have knowledge about all games hyping around themselves but sometimes, these games possess errors and faults that can create hindrance to your game. One such error is DX11 feature level 10.0 is required to run the engine. Now let us study this error in this error.
The DX11 feature level 10.0 is required to run the engine message generally occurs while playing games like Fortnite, ARK or Pubg. This happens when your system does no longer have the suitable Direct3D Hardware Feature Level.
On the other hand, if your system has latest DirectX version, it means either it is using an outdated DirectX or have some graphic issues. Luckily, there is nothing to worry about it. It can be fixed easily.
Before coming to the solutions, let us discuss about the DirectX first.
Read Also:
- Windows Key Not Working
- How To Fix WMI Provider Host
- How To Fix This App Can’t Run On Your PC Error Message On Windows 10
Contents
- 1 What is DirectX?
- 2 DirectX Runtime vs Direct3D Hardware Feature Level
- 3 How to find out if DirectX is installed
- 4 Method 1: Running the application with the dedicated GPU
- 5 Method 2: Updating your graphics card driver
- 6 Method 3: Repairing the DirectX runtime environment
- 7 Method 4: Installing the platform update KB2670838 (Windows 7 only)
- 8 Method 5: Install the latest patch
- 9 Method 6: Install the latest DirectX
- 10 Conclusion:
What is DirectX?
A DirectX is a packed full of application programming interfaces (APIs) and without it most of the games you play would not exist. The aim of DirectX is to handle the game programming tasks and provide the best experience.
DirectX Runtime vs Direct3D Hardware Feature Level
It is noticed that users get confused between DirectX Runtime and Direct3D hardware. Direct3D hardware is the subset of DirectX, it describes the help that your video hardware (GPU) offers.
How to find out if DirectX is installed
In case you have Windows10 with latest updates, DirectX 12.0 Runtime was automatically installed in your system. But so that you can use the new DirectX APIs, your GPU card wishes to help them.
To check which DirectX is installed in your system, press windows logo and ‘r’ key together. A Run box will pop up, type “dxdiag” and Click on OK. Under System tab, you will see your DirectX runtime version.
Now, the next thing is to check your GPU is able to support the required feature levels:
- Move to the Display option and look at the Function levels.
If the feature level 10_0 (10.0) is not showing up in the DirectX tool box, following may be the reasons:
- Outdated Drivers
- Different feature level
- Platform Update
Fixing the “DX11 feature level 10.0 is required to run the engine” error
Methods given below are the solutions that could help you to deal with the error and are reliable to use. These methods given below doesn’t require any kind of technical knowledge just a basic knowledge about device is needed and then you can follow steps and deal with the error.
Method 1: Running the application with the dedicated GPU
If you’re seeing the mistake on a computer or laptop, there are chances that you may have a dedicated GPU and an integrated solution. If you have got cards, your system will decide on which GPU card to use by reading what number of resources are required through the software engine. However, this can be overridden by using your battery-saving application – if it’s set to battery-saving mode, it would pressure the system to start this system with the included GPU.
It can easily be done by making changes in the “Performance mode”. But if you do not wish to uninstall the Battery mode, you can follow the given steps:
- Right click on Game Shortcut and select Run with Graphic Processor.
- Select your Dedicated card.
- Now, go back to the settings and press on Change default graphics processor to set it.
Method 2: Updating your graphics card driver
As mentioned earlier, an outdated, missing or corrupted graphics card driver can cause this error. To solve it, the first step is to update your graphics card driver. To do so, it can only be done by installing the right graphics driver in your operating system.
- Installing graphics driver via Device Manager: The first step is to update your graphics driver via Device Manager. If this method does not update your driver, follow the following steps:
- The first step is to press Windows logo and R key together.
- In the Run box, type msc and hit Enter button.
- In the Device Manager, move to Display Adapters and expand the drop-down menu.
- Click on the graphics driver and choose Update Driver.
- Afterwards click on the first option i.e. Search automatically for updated driver software and wait until your system search for the latest drivers.
- Now, install it.
- Users with Nvidia graphics cards: There are two different ways in which you can update the drivers.
The first step involves downloading GeForce Experience which let the software to automatically identify your GPU and install the required drivers. But sometimes, it does not function properly.
On the off chance, if it did not work. Try following the steps given below to install the new graphics:
- Go to the official NVIDIA Drivers Download page and fill the acquired information. Also, to make sure to select your correct operating system and press on Search button.
- Download and install the recommended driver.
- The final step is to restart manually and check whether the issue is solved or not. (Generally after the installation process, system automatically reboot itself)
- Users with ATI graphics cards: To automatically update the drivers, you can use AMD which is equivalent to GeForce Experience. In order to get best experience, Gaming evolved will help to optimize your games by making required changes in the settings. It also keeps your system updated.
If you do not want to get an additional program, you can simply follow the steps given below:
- Go to the official AMD Downloads page.
- You will come across two options:
- Automatically detect and install your driver
- Manually select your driver.
Selecting Automatically detect and install your driver will install an ATI utility which will apply the appropriate driver. On the other hand, in Manually select your driver option, fill up the Product type, Product family and model of the product, and enter Display Results.
- Once the driver is installed, it is necessary to restart your system and check if the problem still exists.
- Users with integrated Intel Graphics: As we know, Intel graphic cards are produced by ATI. In most of the cases, it automatically gets updated from the Device Manager. But you are not able not to update it, following are the steps to download it:
- Go to Intel’s download page,
- Fill-up the products and driver. Also, to make sure you select the right Windows.
- Click on Description.
Method 3: Repairing the DirectX runtime environment
As we cannot uninstall DirectX directly because DirectX runtime 11.3 and 12 is already installed in your system. But you can repair it with the help of DirectX End-User Runtime Web installer and DirectX Redist (June 2010) by following the steps mentioned below:
- DirectX End-User Runtime Web installer
- Download DirectX End-User Runtime Web Installer and Right-click on Executable.
- Select Run administrator and follow the instructions displayed on-screen to complete the process.
- DirectX Redist (June 2010)
- Now, download DirectX Redist (June 2010) from this link below
https://www.microsoft.com/en-us/download/details.aspx?id=8109
- Open package and search for DirectX SDK.
- Select DXSetup executable and follow the instructions displayed on-screen to complete the process.
Reboot your system once the process is done.
Method 4: Installing the platform update KB2670838 (Windows 7 only)
Windows 7 requires a different kind of platform update to enable DX 11 function. So, you just have to install the KB2670838 platform update in your system and reboot it to check if the issue is solved.
Method 5: Install the latest patch
Sometimes, game developers release patches to improve their games and fix the errors. You must keep a check on the updates or timely visit the official website to avoid any kind of error. Afterward install the latest update to keep it up to date.
Method 6: Install the latest DirectX
To install the latest DirectX, first you need to check the version of it. Follow the steps given below:
- Press Windows logo button and ‘r’ key together. A run box will pop-up.
- Write dxdiag and click on OK.
- Under System tab, you may see the DirectX version.
- Move to the Display option and look at the Function levels.
- Now, make sure that DirectDraw Acceleration, Direct3D Acceleration, and AGP Texture Acceleration are enabled.
It’s time to update the latest DirectX and Feature level.
DirectX version: In Windows 10, Windows 8, you can directly update your DirectX version. But in Windows 7, there is a need to install an update package to update the latest DirectX version.
If you get any problem in installing them, you can visit the Microsoft website about how to install the latest version of DirectX.
Feature Levels: As we know, graphic cards are the powerhouse of your device and stimulates all the graphics. There are two reasons for the occurrence of this error in the feature levels:
- Your Graphic card does not support the required Feature Level.
- Graphic Card can be outdated, missing, and also corrupted.
Read Also:
Conclusion:
All these methods which are described will help you to fix the DX11 feature level 10.0 is required to run the engine. As mentioned earlier, this kind of error is common and could be handy to deal with. Hope it helps you.


